Joined: May 2018 Posts: 1,914 Threads: 102
Reputation:
20
Location: Llandrindod Wells
Car type: 29 Special, 30 RK, 28 C Cab
Hi Tim
Looks really good.
You have the same problems as me. Not enough covered garage space!!!
My RK has been relegated to the canopy beside the garage so I can work on the special. Hopefully the “Smart car” breathable cover will keep it safe between trips out!
Cheers
Howard
Joined: Aug 2017 Posts: 2,249 Threads: 33
Reputation:
35
Location: Deepest Frogland 30960
Car type: 1933 RP Standard Saloon
21-10-2019, 08:06 AM
(This post was last modified: 21-10-2019, 08:08 AM by Reckless Rat.)
Similar to Boyles law, the amount of crap you accumulate always expands to fill the available space and will escape its confines given the slightest opportunity. You will NEVER have enough room!
When we moved to the new house I built myself what I considered was a big garage. It is 8m by 8m with loft storage. There are three cars in it at the moment and three others parked outside. QED.
Joined: May 2018 Posts: 2,798 Threads: 533
Reputation:
20
Location: Peak District, Derbyshire
Car type: 1929 Chummy, 1930 Chummy, 1930 Ulster Replica, 1934 Ruby
21-10-2019, 02:19 PM
(This post was last modified: 21-10-2019, 02:40 PM by Tony Griffiths.)
(21-10-2019, 08:06 AM)ehiclesReckless Rat Wrote: Similar to Boyles law, the amount of crap you accumulate always expands to fill the available space and will escape its confines given the slightest opportunity. You will NEVER have enough room!
As many collectors of easy-to-store motorcycles find - they just end up with too many and never get to use them. Possibly, just possibly, the answer is to have no more than two or three cars that are exercised regularly and enjoyed (unless one is in it just for the investment). A good friend has just two classic/vintage cars at any one time, enjoys them greatly but tires of them after a few years and moves them on. He then revels in the hysteria of tracking down and buying something new and unusual. This seems to a good way as any of experiencing some interesting vehicles with minimum outlay (though of course, when things go wrong, and mysterious ailments come to light, the red ink can start to appear).
Joined: Aug 2017 Posts: 858 Threads: 47
Reputation:
4
Location: North Wiltshire
Car type: 1927 Chummy, 1926 Top Hat 1938 Big Seven 1/2 a Trials Chummy
27-01-2020, 10:50 PM
(This post was last modified: 28-01-2020, 11:15 AM by Parazine.)
Well, it’s been a while since I last reported some progress, mainly because there hasn’t been any recently. However, the scheduled job this winter was the engine rebuild.
Remember, this was a reputedly low mileage car but it transpired that it had been involved in a serious accident at some time in its life. However, the engine should be OK, shouldn’t it? To be fair, I had run it very briefly when I first acquired the car but it left a trail of oil and smoke together with making horrible thumping noises. I decided that a full investigation and rebuild was necessary.
This afternoon, the appointed hour was met and the strip down started in earnest.
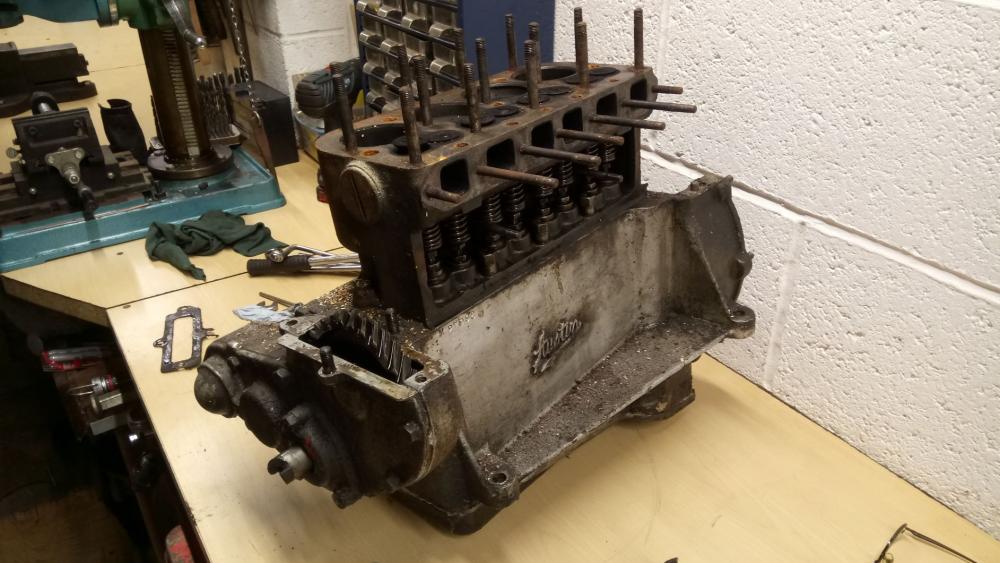
Oh, but what’s this? A Bodger has been inside the engine! Camshaft timing gear broken!

However, the pistons are original and carry the engine number.


Oh no! More evidence of the Bodger’s handy work. ¼ Whitworth sump bolts forced into ¼ BSF oil tray holes!

The Bodger had used glazing putty as gasket sealer!

More evidence inside, bits of wire securing the big end nuts. One of them has a mangled split pin….
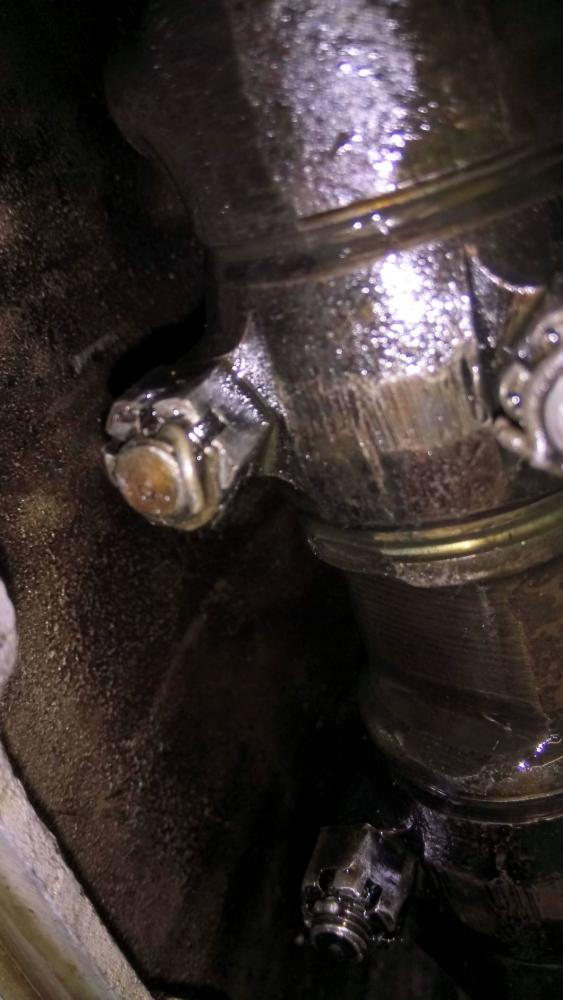
The Bodger managed to get this cap on the wrong way round. There was about 1/8” play in this big end, that explains the thumping noise then!
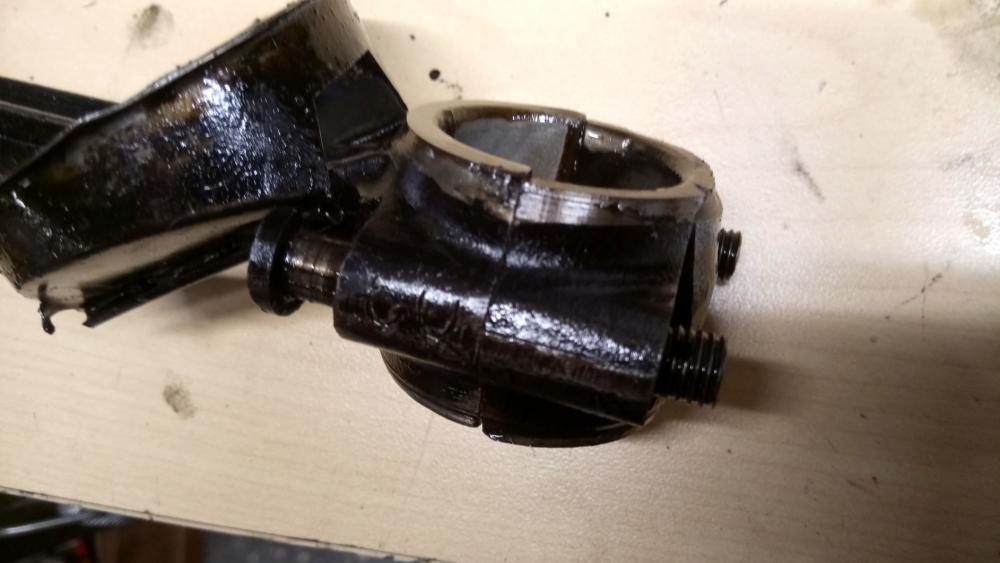
What had been going on? Why on earth did the Bodger go to the lengths of stripping the engine down with clearly limited skills? There was a reason (I guess) but you'll have to wait for the next post so that I can include more horrifying photos!
Joined: Aug 2017 Posts: 2,928 Threads: 160
Reputation:
35
Location: Sherwood Forest
Car type: 1938 Talbot Ten Airline
Sounds like a typical 1950s shoestring overhaul, probably done mid-winter, outside with just street lighting; oh, and it was probably raining hard at the time!
Joined: Aug 2017 Posts: 3,247 Threads: 360
Reputation:
16
Car type:
Be interesting to hear what the consensus is on the timing gear. When I posted a slightly less bad example, it was suggested it was ok as most of the surface was useable... this might be the same?
Joined: Aug 2017 Posts: 858 Threads: 47
Reputation:
4
Location: North Wiltshire
Car type: 1927 Chummy, 1926 Top Hat 1938 Big Seven 1/2 a Trials Chummy
Everything in this engine carries the engine number 27998, except..........the crankshaft!

If that's an engine number, it dates to spring of 1924.
So the engine was rebuilt sometime in the late twenties I guess (the car came off the road in the summer of 1931) to change the crankshaft, probably for a second hand one. Again, I wonder why? Did the original break? I had always assumed that crankshaft breakage was a (relatively) recent complaint, due to poor maintenance and aged materials but maybe it was already happening a few years after the cars were made......
However, all the rods carry the 27998 number, so they ran on the original crank and there are no scars inside the crankcase to show a break. The metaling looks to be original....But why else would anyone want to replace a crankshaft??
I spent hours and hours sorting out the big ends. Two rods had to be replaced, number 4 because it was tired of running with the cap on back to front and was worn out, plus number 2 because it was heavily shimmed, having been filed too much by the Bodger. Fortunately, I have a small stock of good 1 1/8" rods to choose replacement from but the scraping takes a long time.....
I guess this is an early crank as it doesn't have any relieved spots to bash the main bearings out of the crankcase
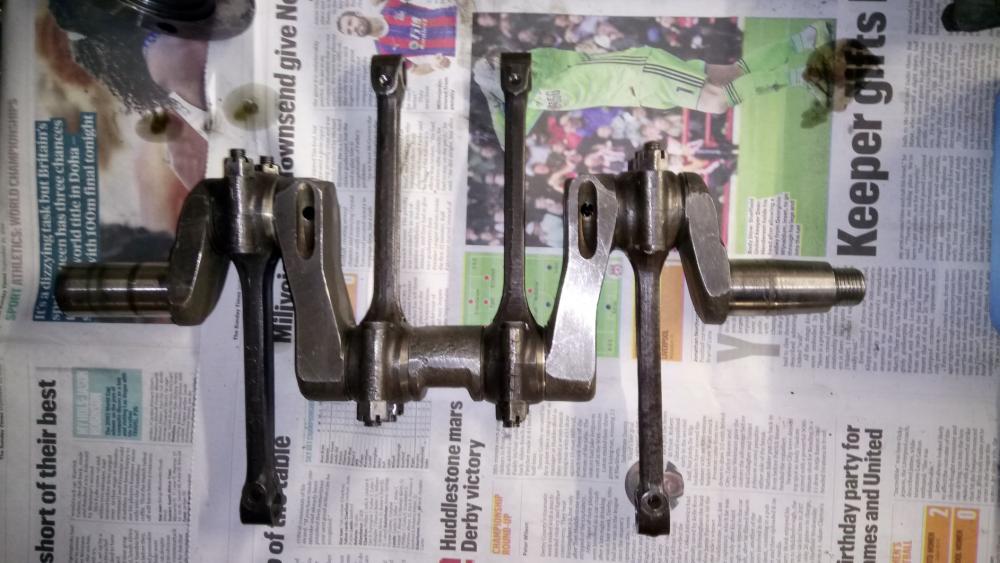
Anyhow, I have to settle down to cleaning this lot over the next few days and sorting out the block...


Joined: Aug 2017 Posts: 29 Threads: 0
Reputation:
0
This maybe an old wives tale but I remember being told that if a car left the production line and made it to the gates (under it's own steam) then it was sent off to be sold. If the crank broke (before it reached the gates) a new engine was fitted and stamped with correct no. The failure rate became so high that the stamping was stopped and a car with an engine no. 1000 out might be an original non-matching numbers car! That and the changes to crank journal sizes shows that Austin new it was a inherent weakness. As you say, why change the crank for any other reason.
I'm really enjoying reading this thread, with all the bodgery being rectified the right way, more power to your elbow!
Best,
Tom
Joined: Aug 2017 Posts: 2,748 Threads: 31
Reputation:
95
Location: Auckland, NZ
It will be interesting to see how the white metal copes with the pitted crankpins, but oil films are much thicker than in moderns.
If you reuse the pistons dunno where would get original wide rings, unless someone has some used slightly oversize. Does anyone still use? On my car acheived both neglegible and colossal oil consumption with these. Many replacements were too thick and stiff and caused accelerated top groove wear. A very slight shallow chamfer on the top edge often assists low oil use.
My father ran our RP from 1940 to 1960 and met many people familiar with the cars. He had great faith in the car and never heard of broken cranks. Later when I ran it several asked me if it had a 3 brg as these were apparently notorious.
Joined: Aug 2017 Posts: 858 Threads: 47
Reputation:
4
Location: North Wiltshire
Car type: 1927 Chummy, 1926 Top Hat 1938 Big Seven 1/2 a Trials Chummy
I was going to run this engine with standard bores and 1 1/8” crank but chatting it over with some friends last weekend persuaded me to get the block cleaned up and re-bored. Having made that decision, I went for a poke about in the shed last weekend and look what I found!
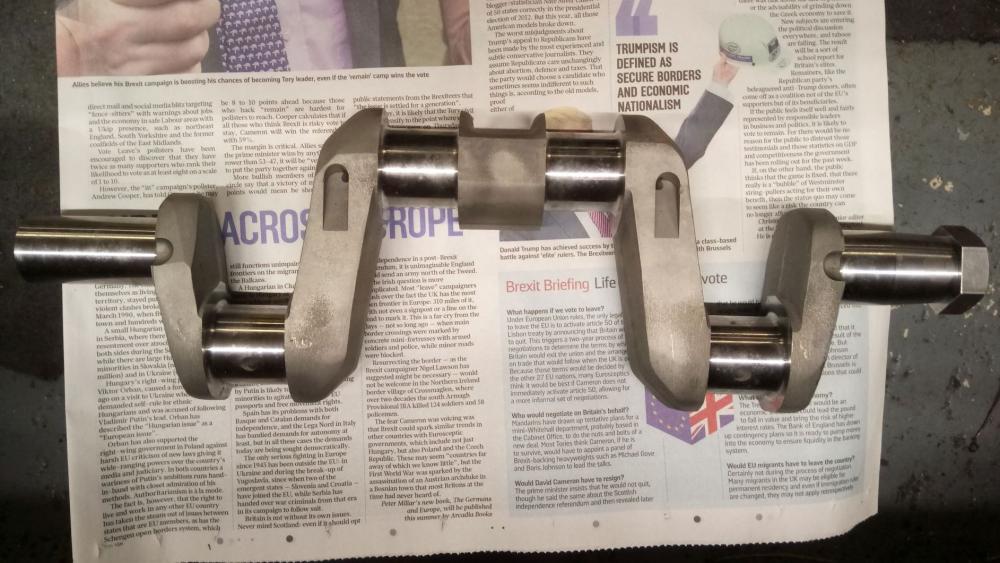
I’ve had this Phoenix crank for more years than I can remember so now it’s time to use it.
Next, I needed to get some rods re-metaled, so I sorted out four 1 5/16” rods, cleaned them up and dispatched them to David Kirkby for attention.
Now, fitting a 1 5/16” crank to a mag (or early coil) crankcase is straightforward but there are three modifications that need to be made.
1) A 7/32” drain hole is needed to return oil back to the sump from the main bearing.
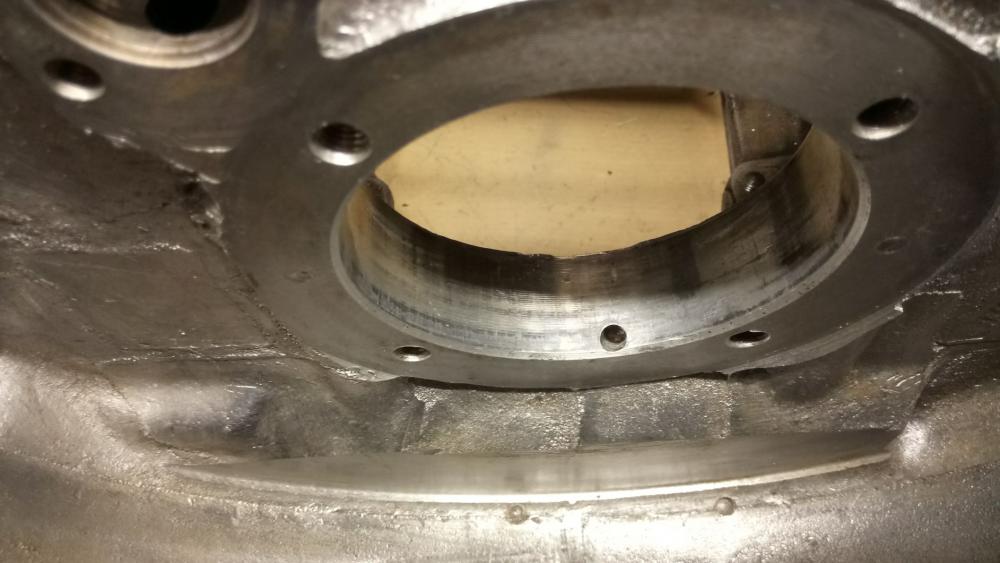
2) The inside of the front lip has to be bevelled to allow room for the front of the crank

3) The camshaft centre roller bearing housing needs to be relieved to allow the larger crank to have clearance.

I made a tool for jobs 2 and 3 above, it’s a length of 1 1/8” bar with two old rear main roller bearings (early, 1 1/8” type) loctited on. These allow the bar to move through as needed. There are two holes for two pieces of tool steel; I use 5/16” silver steel, hardened and tempered. It’s only cutting aluminium. I guess I could add a cutter for relieving the front lip to fit a repair plate but I haven’t needed to yet.
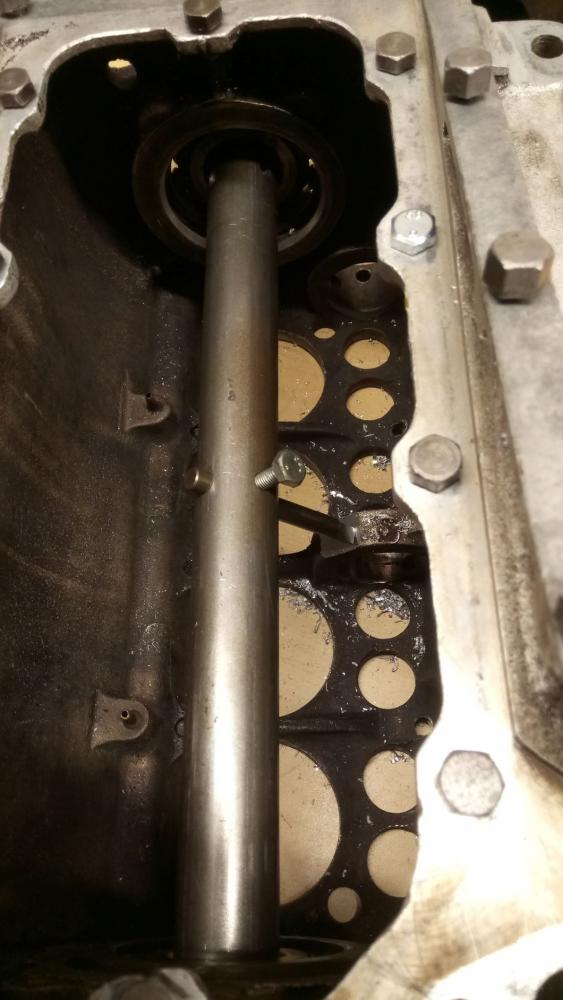
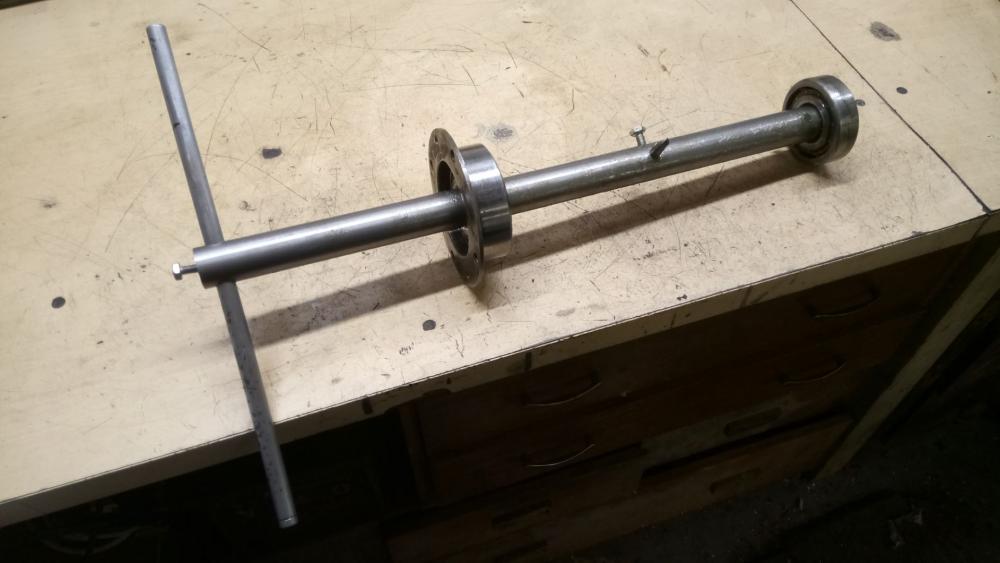
All those have been done so now I can thoroughly clean the crankcase to remove all the swarf before assembly starts.
Meanwhile, the block is away being bored, having been cleaned electrostatically (see the thread on 1 shot drain cleaner for details).
BTW, I've sorted out and helicoiled where necessary the sump and oil tray bolts. They were in a real bad way, having the wrong bolts forced into many of them!
More to follow when assembly starts.
|


